
Broccoli Stem Hummus recipe from Farmbelly.
Read MoreSpiced Pumpkin Cashew Dip
This 100% plant based dip is super creamy and full of warm pumpkin spices, bright citrus, a touch of sweetness, and a hint of heat from the cayenne pepper. Slather it on toast, crackers, apples or (if you’re anything like me..) just eat it straight from the bowl with a spoon.

Spiced Pumpkin Cashew Dip
prep time: 10 minscook time: total time: 10 mins
ingredients
1 cup pumpkin purée (canned is fine)
1 cup raw cashews, soaked for 1 hour in boiling hot water
1 clove garlic
3 tablespoons melted coconut oil
2 tablespoons maple syrup
3 tablespoons orange juice
1/2 teaspoon orange zest
1 teaspoon pumpkin pie spice
1 teaspoon vanilla extract
1/2 teaspoon kosher salt
Pinch cayenne pepper
Pumpkin seeds (optional garnish)
instructions
- Measure out 1 cup of pumpkin puree and put into your food processor.
- Drain the cashews and add to the bowl of the food processor, along with all of the remaining ingredients.
- Blend until mixture is smooth and creamy. Taste and adjust seasoning as needed. If consistency is too thick, add more coconut oil, orange juice, or water.
- Garnish with pumpkin seeds and enjoy!
Created using The Recipes Generator
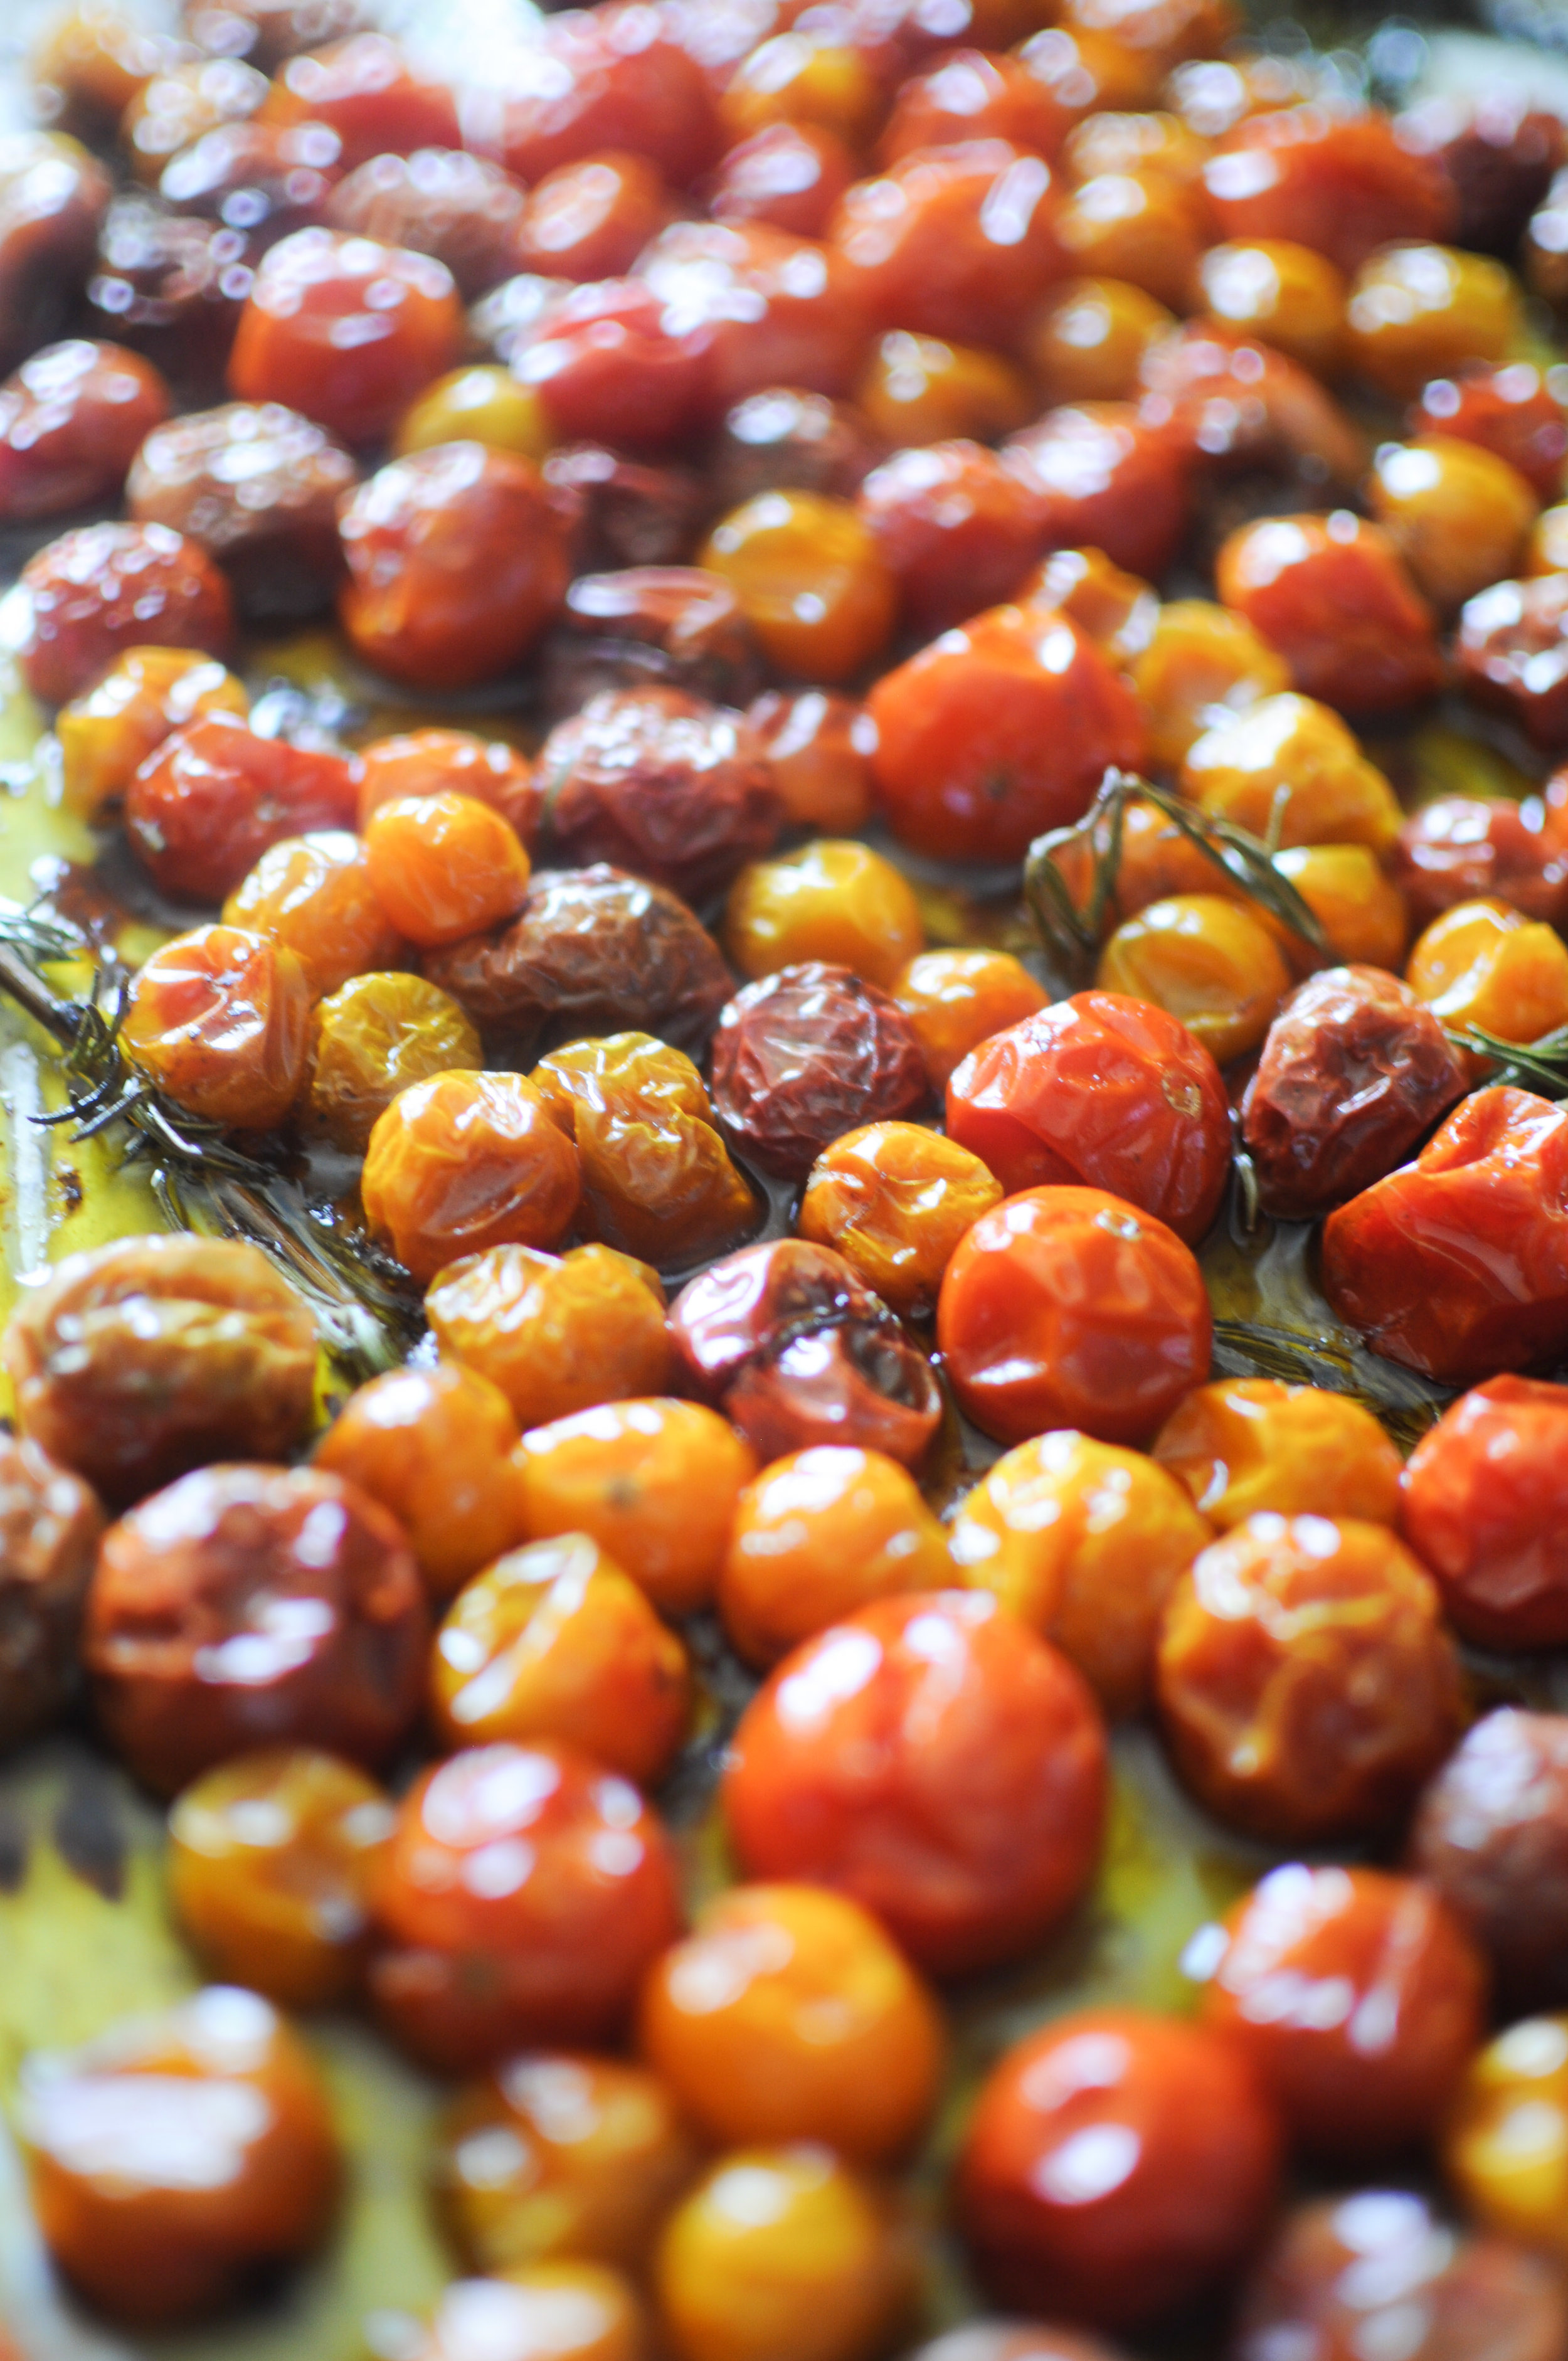
Slow Roasted Cherry Tomato Confit
Without question, cherry tomatoes are my favorite kind of tomato. And my favorite way to cook these sweet bursts of sunshine? Slow roasting them in a warm, luxurious bath of olive oil, fresh herbs, and garlic. This method is called a confit (pronounced con-FEE ), which is a culinary technique where an ingredient is slow cooked in liquid fat. And when I say slow cooked, there's an emphasis on the world slow – as this recipe needs 2-3 hours in the oven.
That being said, this couldn't be easier to prep – just toss your cherry tomatoes onto a rimmed baking sheet with olive oil, herbs, garlic, and some flaky sea salt. The end result is a bevy of cherry tomatoes bursting with juicy, caramelized sweetness – not to mention the leftover olive oil that's infused with glorious tomato-garlic-herb-iness. The slow roasted tomatoes (and the aforementioned infused olive oil) are fabulous on toasted bruschetta, incorporated in bright summer salads, topped on warm ricotta or polenta, or served alongside grilled meats, fish, or chicken. The recipe (which was slightly adapted from the wonderful blog ful-filled) is very forgiving, so feel free to change it up / use what you have on hand.

SLOW ROASTED CHERRY TOMATO CONFIT
PREP + COOK TIME:
Ingredients:
- 2 lbs cherry tomatoes
- 1 cup olive oil
- 4-5 cloves of garlic, peeled and smashed
- 6 sprigs fresh thyme
- 4 sprigs fresh rosemary
- Flaky sea salt
- Pre-heat oven to 275F.
- Fill a rimmed baking tray with whole cherry tomatoes. Add olive oil, garlic, thyme, and rosemary to the tray and sprinkle generously with flaky sea salt.
- Roast, uncovered for 2-3 hours until the tomatoes are swollen and the skins are wrinkled (total time will depend on the size of your tomatoes).
- Cool tomato mixture to room temperature, discard the rosemary, thyme, and garlic (this lengthens the shelf life of the tomatoes). Store tomatoes with oil and accumulated pan juices in an airtight container (I use mason jars) in refrigerator up to 2 weeks, or freeze up to 2 months. Bring tomatoes to room temperature before serving (as the olive oil will harden in the fridge/freezer).
Instructions:
Romesco Sauce
Romesco sauce recipe from Farmbelly.
Read MoreBeet, Moroccan Carrot & Traditional Hummus
This week I had the honor of leading a hands-on cooking class for 40+ amazing women at Municipal Winemakers, as part of a monthly women's group in Santa Barbara, aptly called Rad Night.


Founded by Paola Pereira and Kendall Klein, Rad Night is an opportunity for women in Santa Barbara to come together who might not otherwise meet, and each month women gather, drink wine, and learn + create something together. The theme of the evening was "create + eat like a farmer" and we gave tons of tips for sourcing local produce, and taught everyone how to make compound herb butters and homemade vinaigrettes. I was assisted by my dear friend and fellow chef, Aiyana Sage Thoma, who crafted a most beautiful vegetable platter for all of the ladies to enjoy (See exhibit A below):

To accompany this cornucopia of farmers' market veggies at the Rad Night event, I made three different kinds of hummus: Traditional, Beet, and Moroccan Carrot. Each hummus had it's own distinct coloring + flavor, and I loved exploring new and delicious riffs on an old favorite. Needless to say, the hummus was a hit and I've had several requests for the recipes... so here they are!
PS - For all my Santa Barbara based friends, I'm teaching an another hands-on cooking class at Municipal Winemakers next Thursday, August 11th @ 7-9pm! Join us to learn some knife skills, herb butters, and salad dressings // tickets are $35 and include a glass of wine + delicious handmade goodies to take home. To save your spot (space is limited!), get your tickets HERE.

TRADITIONAL HUMMUS
1 clove garlic
1 can chickpeas | drained
Juice of two lemons (about 1/2 cup)
3 tablespoons olive oil
1/4 cup tahini
1/4 teaspoon paprika
1/4 teaspoon cumin
1/8 teaspoon red pepper flakes
Kosher salt and pepper to taste
INSTRUCTIONS
First process the garlic to a fine mince in your food processor. Next, add the remaining ingredients and process until smooth -the longer you allow the mixture to process, the creamier your hummus will be. Adjust seasonings as needed. Sprinkle with more paprika and serve.
BEET HUMMUS
Recipe adapted from Andrea Bemis, from the blog Dishing Up the Dirt.
1 very large beet (or 2-3 small beets)
1 15 oz can chickpeas | drained and rinsed
2 cloves of garlic
2 tablespoons tahini
2 tablespoons extra virgin olive oil
1 tablespoon ground cumin
Juice from 1 large lemon
Kosher salt and pepper to taste
INSTRUCTIONS
In a saucepan cover beets with water and simmer until tender (about 30 minutes). Once beets are cooked place them in a food processor with all other ingredients and blend until smooth. Taste and adjust seasoning as needed. If mixture is too thick add a little more oil.
MOROCCAN CARROT HUMMUS
Recipe adapted from Andrea Bemis, from the blog Dishing Up the Dirt.
1 pound carrots | chopped into 1-inch chunks
3 whole cloves of garlic | peels left on
4 tablespoons extra virgin olive oil | divided
1 1/2 cups cooked chickpeas | rinsed and drained if from a can
1/4 cup tahini
2 tablespoons fresh lemon juice
1/4 cup water + more to thin if necessary
1/2 teaspoon ground cumin
1/2 teaspoon ground ginger
1/2 teaspoon salt
1/4 teaspoon ground black pepper
1/4 teaspoon ground cinnamon
1/4 teaspoon ground coriander
1/4 teaspoon ground cayenne
1/4 teaspoon ground allspice
1/8 teaspoon ground nutmeg
Fresh cilantro, minced, to serve
INSTRUCTIONS
Preheat oven to 425°F. Toss the chopped carrots and whole garlic cloves with 2 tablespoons of olive oil. Scatter evenly on a baking sheet lined with parchment and roast in the oven until the carrots are tender and lightly browned, 18 to 20 minutes. Toss carrots halfway through cooking. Once cool enough to handle, squeeze the garlic cloves out of their peels.
In the bowl of a food processor, combine roasted carrots, roasted garlic, chickpeas, tahini, lemon juice, water and all of the spices. With the motor running drizzle in the remaining 2 tablespoons of olive oil. Whirl away until smooth, scraping the sides down as necessary. Taste and adjust seasonings if necessary. If the hummus is too thick, add a little more water or oil and process until desired consistency is achieved.
Green Goddess Dressing
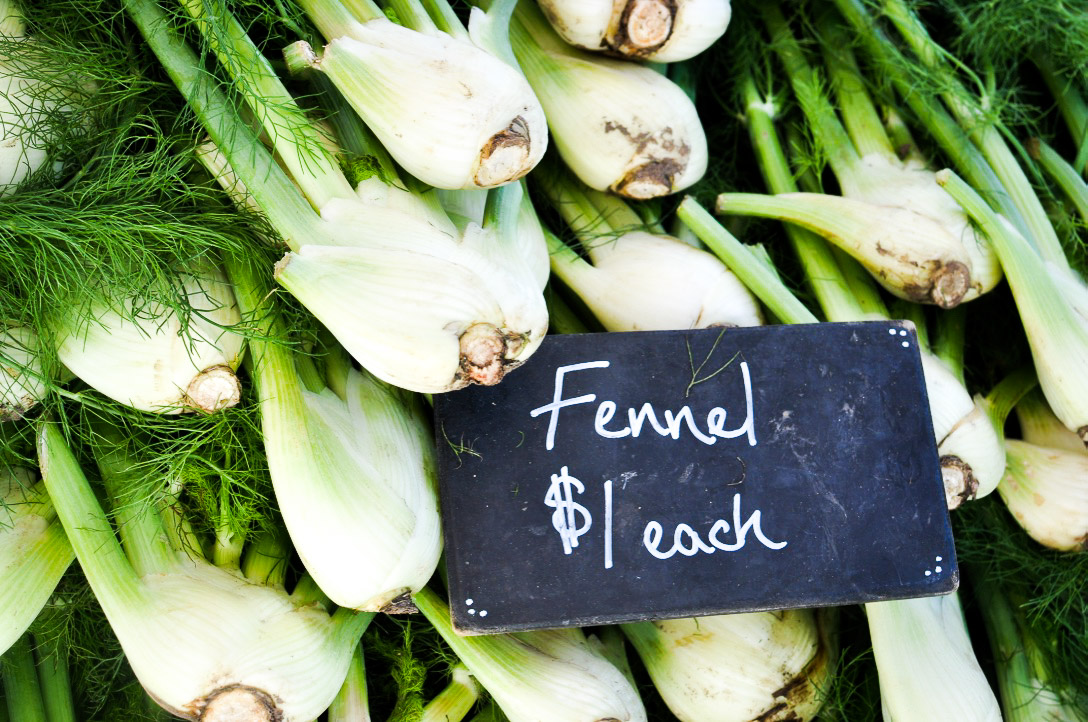
Every week when I head to the Santa Barbara farmers' markets, I'm like a kid in a candy store. It's a total sensory overload walking down each aisle and taking in all of the sights, smells, sounds, textures, and tastes. At the market each week, we get to watch and taste as the calendar year unfolds... spring peas and leafy greens turn into ripe summer fruits, in autumn we find tables piled high with apples, corn, and sweet root veggies, followed by hardy squash and famed Southern California citrus in the colder winter months.
And yet, as wonderful as the farmers' market can be, it's easy to feel overwhelmed by all of the abundance, or to assume that shopping at a big grocery store is more convenient and less expensive. Fear not! As someone who has worked both sides of the farmers' market table, I have heaps of insider secrets that will revolutionize the way you shop at the market. Keep reading for all my tips + tricks of the trade AND get my recipe for Green Goodess Dressing (which doubles as a fabulous veggie dip)!
Canvas the market before making any purchases.
- I always recommend taking a lap around the market before pulling out your wallet. This initial stroll gives you better sense of the farms who have the produce items you need, and which stands have the nicest looking produce, best prices, etc.
PLAN YOUR MEALS AHEAD OF TIME.
Before you head to the market, figure out your meals for the week ahead and write a list of the produce you hope to find (but be sure to leave room to explore and try something new)! This way, you won't be overwhelmed and make impulse purchases that you regret later.
REMEMBER YOUR TOTE BAGS & CARTS.
A small detail, but it's worth remembering those totes and carts! The flimsy plastic bags that some farm stalls provide can easily break and spill your purchases onto the pavement. Plus, you get instant street cred from farmers when they see you rocking your own sturdy bag or cart.
purchase whole vegetables.
Root vegetables like carrots, beets, and radishes are sometimes sold both whole (with greens attached) and trimmed (roots only). When possible, opt for the whole version. When you see the green tops, you know the root vegetables are freshly picked, but even more importantly - the greens are edible and delicious! Carrot and radish tops make fabulous earthy pestos, and beet greens can be prepared the same way as chard or kale.
Don’t be afraid of “ugly” produce.
Many of us are used to seeing waxed, perfectly uniform fruits and veggies at the grocery store... so you'll notice that produce from the farmers' market produce may be less uniform than the supermarket aisle. That's the beauty of shopping at the market! I think the imperfections make the produce even tastier, so don't let a few bumps or extra curves scare you away. One of my favorite bargain bins at the Santa Barbara markets is Fair Hills Farm's boxes of "distressed" apples - if you dig a little, you'll find amazing tasting apples at a fraction of the price!
Learn what’s in season, and buy in bulk when produce is abundant.
The best deals at the farmers’ market are had when you buy seasonally and/or in bulk. Not only will you enjoy the best flavors, but you'll also find the best prices when you buy fruits and veggies at their harvest peak. For instance - the first tomatoes of the season in early May will always be much more expensive than tomatoes in August, when many farms have an abundance of this favorite summer crop.
head home immediately to refrigerate your veggies.
Don’t let those beautiful greens wilt in your hot car! Make sure to bring your hard earned produce home quickly to refrigerate and keep everything nice and fresh.
Get to know your farmers.
Be sure to introduce yourself and get to know your farmers! Farmers love to hear what you are cooking with their produce, and your meals are sure to taste even better after knowing the hands that tended to your fruits and veggies.

As a bit of inspiration for your next foray to the farmers' market, I'm excited to share my favorite Green Goddess Dressing + Dip. This recipe is super quick to make and is packed with flavor and amazing vivid green color thanks to ripe avocado and heaps of fresh herbs.
Green Goddess Salad Dressing

ingredients
Makes 1 cup
- 1 clove garlic | peeled
- 1 cup fresh basil | loosely packed
- 1/3 cup fresh parsley | loosely packed
- 1 ripe avocado | flesh removed
- 1/4 cup olive oil
- 2-3 tablespoons fresh lemon juice (about 1 lemon)
- 1/4 to 1/2 cups water
- Kosher salt to taste (start with a ½ teaspoon)
Instructions
- First pulse the cloves of garlic in a food processor.
- Next add the herbs, avocado, olive oil, and lemon juice in a food processor and process until well blended.
- Add between 1/4 cup and 1/2 cup water to thin dressing to your desired consistency.
- Add salt, taste, and adjust seasoning as needed.
Homemade Mayonnaise
In the sleepy little town of Shanagarry, nestled on the Irish coastline of County Cork, is a place called Ballymaloe - you've likely never heard of it, but let me assure you - it is culinary heaven on earth. Founded in the 1980's by the phenomenal chef / teacher / rockstar matriarch Darina Allen, the Ballymaloe Cooking School is the holy grail of farm to table culinary education.


Located on a 100 acre organic farm, at Ballymaloe nearly all of the fresh ingredients used in the kitchen - from veggies, to berries, raw milk, eggs, and meat - come directly from the farm. This is a cooking school where you go to learn more than just fancy knife skills. Students are expected to pitch in to keep the farm running - harvesting fresh greens for the daily salads, collecting kitchen scraps for compost, milking the cows and making butter to be patted on steaming loaves of just baked bread.
Back in the Spring of 2013, I spent up my entire life savings to spend three intense, delicious, and utterly life changing months at Ballymaloe, where I lived, worked, cooked, and ate copious amounts of Irish butter alongside 50 other students from all over the world. Ballymaloe is truly a family affair - Darina's husband Tim, her brother Rory O'Connell, and daughter-in-law Rachel Allen (all incredible chefs and teachers in their own right) are each deeply involved with the teaching and the day to day operations on the farm and in the kitchens. It is the unending energy and passion for for food + farming from all of the teachers at Ballymaloe that inspired me to start Farmbelly cooking classes!


In honor of all things Ballymaloe, I'm sharing a recipe that embodies the farm to table ethos that makes the school so transformative. Today, we are talking mayonnaise. Yes, you heard me right - mayonnaise. Did you know that real, homemade mayonnaise is actually YELLOW? If you're like me, you may associate mayo with the white gloopy gunk that comes out of a jar and has been sitting in your fridge for goodness knows how long. Alas! The combination of farm fresh eggs, a bit of vinegar and mustard, and slowly drizzled olive oil, all whisked together with gusto, creates an all together different thing that is truly a revelation. PLUS, it takes all of 5 minutes to make. So friends... go grab some farm fresh eggs, get out your whisk, stretch those arm muscles, and get busy!

Ballymaloe Mayonnaise
Ingredients
- 2 egg yolks | from the freshest eggs possible
- 1/4 teaspoon salt
- 1/4 teaspoon French mustard
- 2 teaspoon white wine vinegar
- 3/4 cup sunflower oil (or any neutral oil)
- 1/4 cup olive oil
Instructions
- Put the egg yolks into a wide pyrex bowl with the mustard, salt and the white wine vinegar. Put the two types of oil together into a measuring cup. Take a whisk in one hand and the oil in the other and drip the oil onto the egg yolks, drop by drop whisking at the same time.
- Within a minute you will notice that the mixture is beginning to thicken. When this happens you can add the oil a little faster, but not too fast or it will suddenly curdle, as the egg yolks can only absorb the oil at a certain pace.
- Taste and add a little more seasoning and vinegar if necessary. Enjoy as is, or add some minced garlic, fresh herbs, spices, etc for endless aioli possibilities!