
Farm Notes
Yesterday was a great day for building our second caterpillar tunnel! My friend and fellow farmer Erin joined me for a full day of first prepping the area where the tunnel is going, and then beginning the tunnel construction. (In case you missed it, I wrote a bit about our tunnels and how we use them in my previous post). Overall, everything went super smoothly, and we got a ton done. There are still a few steps to go before the tunnel is finished, but Matthew and I are going to do some work over the weekend, and we will have it completely finished by the end of next week.
Here are some photos from yesterday showing our progress:
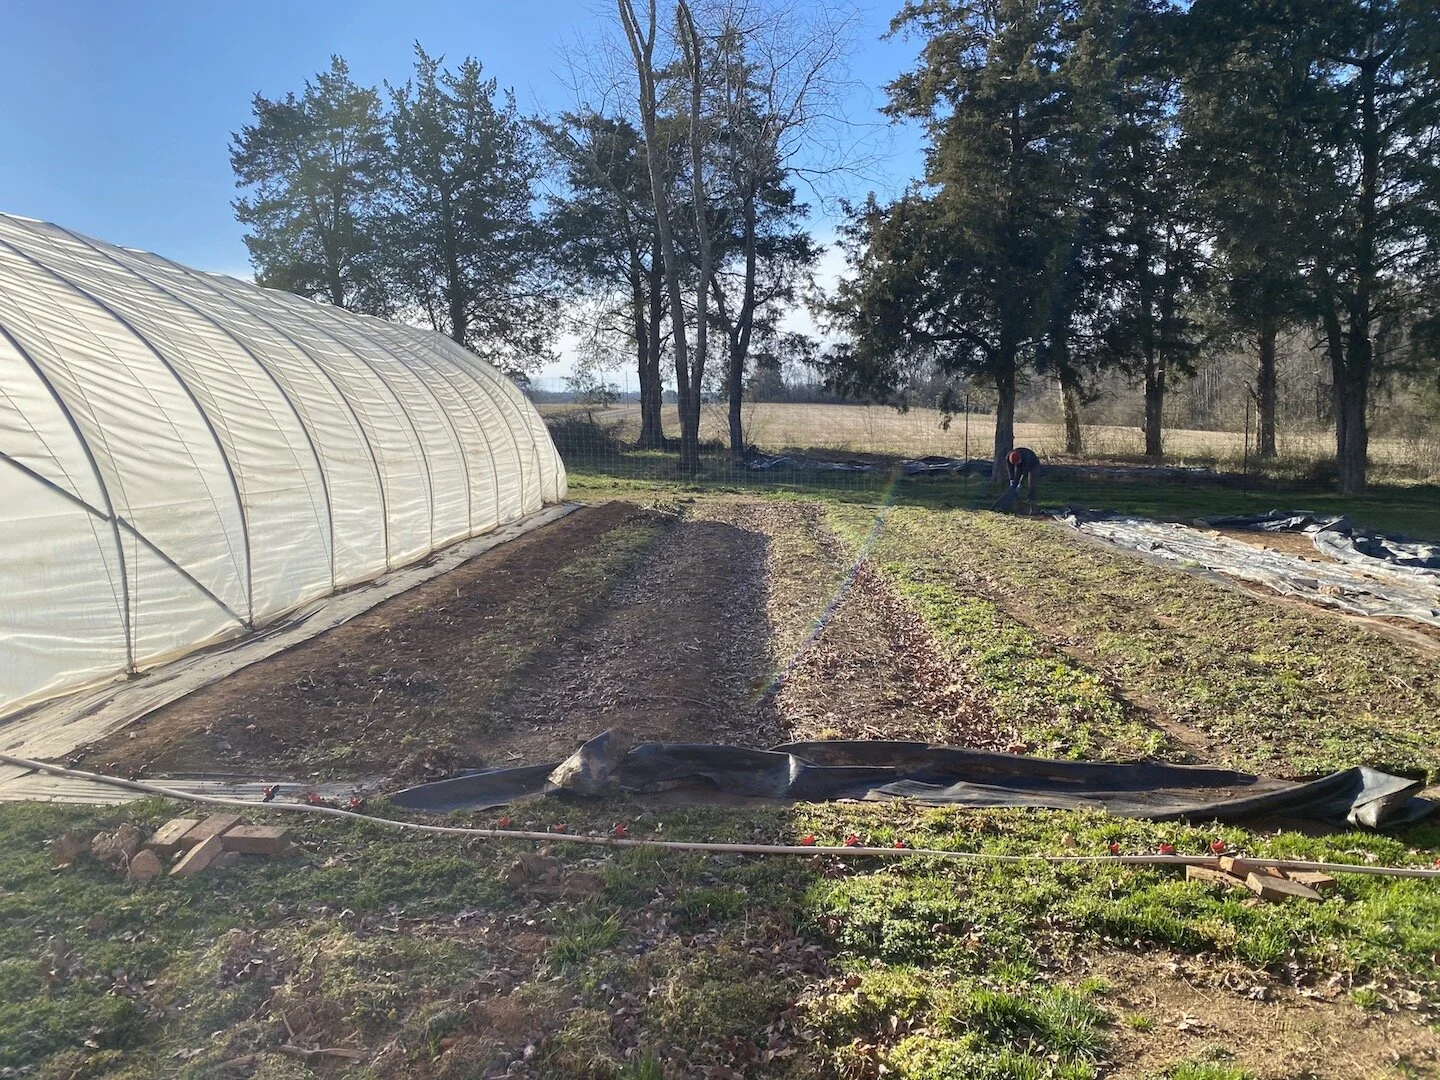
This is the space where tunnel #2 is going – but first we had to rework the beds and measure out the space, and lay down landscape fabric along the long sides of the tunnel.

Photo of the space after we measured out the space, laid down landscape fabric, and pounded in rebar every 5 ft down the long sides of the tunnel.
After prepping the area for the tunnel, we focused on building out all the frames, which went surprisingly quickly. Once the frames were assembled, we carried them over one by one, and they slide over the rebar that we had pounded into the ground every 5 ft. We finished the day by installing the center purlin that goes across the very peak of the tunnel, which is by far the hardest task – but we got it done!

Frame assembly line!

Tunnel frames in their proper places.
Just a few more framing steps to go, and then we can stretch the plastic covering over the frame and lock it into place. The tunnel is getting finished just in time, because our first seeds + seedlings are getting planted the week of February 15th (the week after next). We are timing our plantings with the goal of having veggies ready to re-launch the farmstand on the 3rd week of March... it’s crazy to think that spring is just around the corner!
Kitchen Notes
On Wednesday night this week, I was craving a really good roast chicken. No need to re-invent this well-worn culinary wheel… I turned to a favorite recipe from Alison Roman’s most recent cookbook, Nothing Fancy, for One-pot Roast Chicken with Caramelized Lemon and Dates. While one version of the recipe has you using a whole chicken (which is delicious) – but I didn’t have the time/patience to roast a whole chicken, so I used a version of the recipe that’s meant for smaller chicken parts, like thighs or quarters. All in all, the recipe took just 10 minutes of prep, followed by 25 minutes in the oven, and viola! We had a most delicious, one-pot dish of juicy, crispy-skinned chicken and some mouth-watering caramelized lemons, dates, and shallots that we spooned over brown rice.
So if you also find yourself craving a darn good roast chicken dish that goes from pot to plate in under 45 minutes, give this recipe a go. PS – If you’re looking for more crave-worthy recipes, I definitely recommend subscribing to Alison Roman’s weekly newsletter and/or tuning into the videos on her YouTube channel. There is a new video of Alison making this very chicken dish, so go check it out!
Alison Roman’s One-Pot Chicken with Caramelized Lemon & Dates

Photographed for Nothing Fancy by Michael Graydon & Nikole Herriott, props by Kalen Kaminski
INGREDIENTS
~3 lbs. bone-in, skin-on chicken quarters or chicken thighs
Kosher salt
Freshly ground pepper
1 tablespoon canola oil
1 lemon, cut into thick slices crosswise (about 1/4” thick), seeds removed
2 shallots, peeled if you want, halved lengthwise (or one red onion, peeled and cut into wedges)
6 medjool dates, pitted
4 sprigs thyme or oregano, plus more for serving
1–2 teaspoons crushed red pepper flakes
INSTRUCTIONS
Preheat oven to 425°.
Season chicken with salt and pepper. Heat oil in a large dutch oven over medium–high heat. Place chicken, skin side down and using tongs or your hands (be careful!) press lightly to make sure the skin comes into even contact with the pot.
Cook, without moving, until chicken is nice and browned, 5– 8 minutes. You will likely need to brown the chicken pieces in batches. Once you’ve finished browning a piece, remove it with tongs to a plate and a new piece in its place. A note that during this step while the chicken is browning, I’ll slices the lemons, shallots, and dates to speed up the prep for this dish.
As you get to the end of browning the chicken, add the lemon slices to the pot, maneuvering the chicken as needed so that the slices come into contact with the bottom of the pot. Some of the chicken pieces will probably need to stay out of the pot a bit longer, for the lemon slices to fit.
Let the lemons sizzle in the chicken fat until caramelized on one side, about 2 minutes. Add all the chicken pieces back into the pot (skin side up), along with the shallots, dates, thyme and 1.5 cups of water. Sprinkle the top of the chicken with crushed red pepper flakes and another pinch of salt.
Place dutch oven in the oven (with the lid OFF the pot so the chicken skin can get crispy) and roast until the dates are plump, the lemon is jammy and the chicken is cooked through and golden (and a thermometer inserted into the thickest part of the chicken reads at least 165F).
Remove from oven and let chicken rest in the dutch oven for 10 minutes before transferring it to a serving platter. Serve alongside shallots, lemons, and dates with some more thyme sprinkled over. I recommend enjoying with rice, and spooning some of the yummy juices from the dutch oven spooned over the rice.
DO AHEAD: This chicken can be made a few hours ahead, kept in the dutch oven. If you wish to reheat it before serving, pop it back into the oven without a lid for 10–15 minutes or so.
Today’s Stats
Low temp: 38F
High temp: 55F
Sunrise: 7:14am
Sunset: 5:48pm
Moon phase: Waning Crescent
Additional notes: Cloudy and cool all day.