Farm Notes
Oooh boy, it feels like winter has ARRIVED this week! Overnight lows are in the mid-twenties this week, which means the garden is a sea of row cover protecting the plants from freezing temps. But thankfully, I only have one more week of worrying about keeping all the veggies alive, because next week is the FINAL week of our CSA for the 2022 season!
This was our third full growing season here, and I can say with confidence that it was our best and most productive yet. That’s not to say that I didn’t make mistakes and have failures.. trust me, there were still LOTS of those! But with every season that passes, our soil improves, my knowledge of this land gets deeper, I learn more about what our community wants in their boxes, and we work more efficiently. In the coming weeks, I’ll share more about the specific wins and losses this season, along with our goals for next year – and I’ll also share a helpful framework for asking yourself the same questions as you start to think about your growing season in 2023!
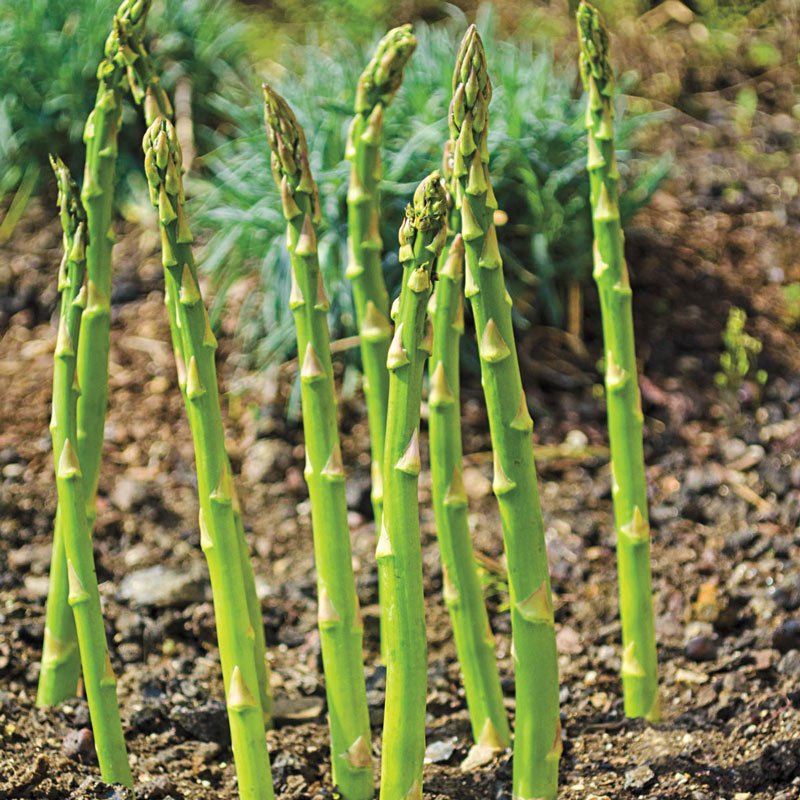
In preparation for the cold week we are having, last weekend I pruned, fertilized, and mulched our asparagus beds, tucking the plants for winter. In case any of you also have asparagus (or other perennials that could use some late fall pruning), below is a quick tutorial on how to prepare them for the winter months ahead. (PS – I also made a fun video tutorial of this process over on my instagram, which you can check out here).

PREPPING ASPARAGUS / PERENNIALS FOR WINTER
1) Once the asparagus (or other perennial plant) has died back and turned brown, prune back the stalks, leaving about 1” above the ground. It is generally not advised to leave the plant matter you’ve cut back on the bed, as there could be pests living in the plants that would then stay in your soil (so I just compost it).
2) Clear the growing bed of any weeds.
3) Add some good compost to the bed (a few inches thick), which will release nutrients to the soil throughout the winter.
4) Finally, mulch the plants with dead leaves, pine needles, or wood chips to help protect them from freezing temps (and keep weeds at bay).
For a full farm walk from today, check out my virtual tour around the farm from this morning here.

Asparagus bed pruned and weeded…

…and then fertilized with compost and mulched with leaves.
The other big news is that TODAY I’m releasing our line-up of Spring 2023 Workshops here at the farm! There's a little something for everyone – from Home Gardening 101, to Spring Salads, Knife Skills, Pickling & Fermenting, and many more.
All of our workshops are 100% hands-on, and include a full walking tour of the farm + you'll help harvest veggies and herbs that we will use to make and enjoy vibrant, seasonal dishes together. Farmbelly workshops take place outside on the farm (and under our nice big, shaded structure) with a max of 10 people, to ensure an intimate and safe experience for everyone. I know that most of you wonderful Farmbelly Club members are not local to NC, so I’m sorry that these workshops likely aren’t really accessible… but hopefully I’ll get to see many of you here in the new year!

Last but not least – only TWO days left to get your Farmbelly merch! Snag a vintage-inspired Farmbelly t-shirts, a super cozy + comfy sweatshirt, an extra big tote bag, or a stylin' baseball hat. Merch orders close at midnight this Sunday, Nov 20th.
PS – A note that you will likely receive a separate email that goes out to my entire mailing list about our Spring 2023 Workshops… I’m sorry about the double email, I promise it won’t happen often!
PPS – I took y’all on a virtual farm walk this morning, with lots of new veggies to see + helpful gardening info for you! For a full tour of the farm + tips for your own gardens, here’s the link to watch via our private Facebook group. :)
Kitchen Notes
This week I was looking for an excuse to cook with the big, beautiful heads of cauliflower that we grew this year (my first cauliflower crop ever, as I mentioned last week!) and I was inspired to whip up a big pot of curry with chicken and veggies. Curry dishes may seem complicated, as they tend to have a longer list of ingredients, but you most likely already have everything in your pantry/fridge, and curries really do come together quickly once you get going. Feel free to use different spices or veggies based on what you have on-hand, and you can absolutely omit the chicken if you’d prefer a vegetarian curry.
CHICKEN & VEGGIE CURRY

Photo Credit: EatWell101
INGREDIENTS
2 tablespoons olive oil
2 teaspoons curry powder
2 teaspoons minced ginger root
1 teaspoon turmeric
3 cloves garlic, minced
1 pound boneless skinless chicken thighs, cut into 1” cubes
1 medium yellow onion, diced
1 teaspoon kosher salt, plus more to taste
1/2 teaspoon black pepper
1 medium sweet potato, peeled and diced into 1/2 inch cubes
2 cups cauliflower cut into florets (1 small head)
1 tablespoon tomato paste
2 cans (13.5 ounces) unsweetened coconut milk
Splash of fresh squeezed lime juice
Handful chopped cilantro leaves (optional garnish)
INSTRUCTIONS
Heat the olive oil in a pan over medium heat. Add the curry powder, turmeric, minced garlic and ginger root, and toast, stirring, until fragrant well combined, 1 to 2 minutes.
Add the chicken, onion, salt and pepper and toss until evenly coated in the spices. Cook, stirring occasionally, until chicken is cooked through, about 5 minutes.
Add the sweet potato, cauliflower, and tomato paste and toss into the mixture until evenly combined. Add the coconut milk and stir until well combined.
Bring the curry to a gentle simmer and cook, uncovered until sweet potatoes are fork tender, about 15-20 minutes. Add a splash of fresh lime juice, and taste and adjust seasoning as needed. Serve over rice and garnish with cilantro, if desired. Enjoy!
Today’s Stats
Low temp: 26F
High temp: 49F
Sunrise: 6:57am
Sunset: 5:07pm
Moon phase: Waning crescent
Additional notes: Sunny and chilly