Blueberry-Ginger Galette with Pecan Crust

A galette, aka a rustic pie, is the ideal vehicle for containing ripe, juicy, sweet summer fruits for a perfectly imperfect dessert. Use this recipe as a guide for whatever fruits you have on hand – raspberries, blackberries, cherries, peaches, pluots, etc – don’t overthink this folks. Galettes are best after sitting for several hours or overnight (allowing all those juices to settle and firm up a bit), so they’re a great make-ahead dessert for summer dinner parties. All you need is a scoop of vanilla ice cream (or whipped cream or creme fraiche) to top it all off!

galette-6.jpg

Blueberry-Ginger Galette with Pecan Crust

Author:
Recipe adapted from Bon Appetit.

ingredients:

Pecan Galette Dough
  • ½ cup pecans
  • 1 cup plus 2 tablespoons all-purpose flour
  • 2 teaspoons sugar
  • ½ teaspoon kosher salt
  • ¼ teaspoon ground cinnamon
  • ½ cup (1 stick) chilled unsalted butter, cut into pieces
Blueberry Filling
  • 12 ounces blueberries (about 2 cups)
  • 1 tablespoon tapioca flour (or cornstarch)
  • 2 teaspoons fresh lemon juice
  • 1/2 teaspoon grated fresh ginger (or more, if you really like ginger)
  • 1/3 cup sugar, plus more for sprinkling
  • All-purpose flour (for surface)
  • 2 tablespoons half-and-half or heavy cream

instructions:

How to cook Blueberry-Ginger Galette with Pecan Crust

Make the dough
  1. Preheat oven to 350°. Toast pecans on a rimmed baking sheet, tossing once, until fragrant and slightly darkened, 10–15 minutes; let cool. Pulse pecans in a food processor until the consistency of coarse meal. 
  2. In the same food processor as the ground pecans, add flour, sugar, salt, and cinnamon and pulse just to combine. Add cold, chopped butter and pulse until mixture resembles coarse meal with a few pea-size pieces remaining. Drizzle with 4 tablespoons ice water and pulse a few more times to mix. 
  3. Transfer the dough to a large bowl and mix quickly with your hands, adding another tablespoonful of water if needed, just until the dough comes together in a ball. Pat dough into a 6"-diameter disk, wrap in plastic wrap, and chill for at least 30 minutes.  
Filling and Assembly
  1. Preheat oven to 375°. Toss blueberries, tapioca flour (or cornstarch), lemon juice, grated ginger (I use a microplane to grate ginger) and 1/3 cup sugar in a large bowl.
  2. While the berries macerate in their juices, roll out the chilled dough on a lightly floured piece of parchment paper to a 12" round, 1/8" thick. Carefully transfer the parchment paper with the rolled-out dough onto a baking sheet. Mound the blueberries in center of the dough, leaving a 2" border. Carefully lift and fold the edges up and over the filling, allowing the dough to naturally pleat at 1-2 inch intervals as you fold. Brush dough with cream and sprinkle with sugar.
  3. Bake galette until crust is dark golden brown and filling is bubbling, 45–55 minutes total, rotating the pan halfway through baking. Allow to cool before enjoying. Just before serving, top with scoops of your favorite vanilla ice cream, whipped cream, or creme fraiche for the ultimate galette experience.
Created using The Recipes Generator

Pickled Peaches

I’ll be honest – the first time I made pickled peaches, I was very skeptical (and you probably are too). Alas! I’m so glad that I persevered, because these lovelies are nothing like the mushy, slimy, overly sweet peaches that come from a can at the store. Homemade pickled peaches strike the perfect balance of sweet, tangy, and a little bit of spice – they are delicious spooned over ice cream, dropped in a glass of sparkling wine/water, served in a salad or alongside sandwiches, or better yet – just eaten straight from the jar. These are 'refrigerator' pickles, so there's no need to deal with hot water bath canning, and they store in your fridge for ~1 month - so it’s a great way to extend the life of your stone fruit. Keep scrolling for the recipe, which was adapted from chef Damaris Phillips’ recipe.

F8FD0F89-0E50-4DF7-A53A-5614AE464408.JPG

Quick Pickled Peaches

Yield: 1 quart-sized jar, or 2 pints
Author: Michelle Aronson, Farmbelly

ingredients:

  • 1 1/4 cups rice wine vinegar
  • 1/3 cup honey
  • 1/3 cup sugar
  • 1/2 teaspoon pumpkin pie spice
  • 1-inch chunk ginger, peeled and chopped
  • 2 pounds peaches (about 6-7 peaches), peeled, pitted and quartered

instructions:

How to cook Quick Pickled Peaches

  1. To peel the peaches, make sure they are ripe (but not too soft). Cut a shallow cross in skin at blossom end of each peach. Plunge the peaches, a few at a time, into large pot of boiling water for about 30 seconds. Transfer fruit to bowl of ice water until cool enough to handle, then strip away skins using your fingers (use paring knife for any stubborn bits). Cut the peeled peaches into quarters or 1/2" thick slices.
  2. In a saucepan over medium heat, combine the vinegar, honey, sugar and pumpkin pie spice. Heat and stir until the sugar dissolves, 2 to 3 minutes. You do not want this to get too hot or it will over-cook the peaches.
  3. Put the ginger in the bottom of a 1-quart mason jar, then fill with the peeled peaches. Pour the liquid over the peaches, leaving 1/2" of head space. All to cool, seal, and store in the refrigerator. They will be ready to eat in a few days, and will last in the fridge for 1 month.
Created using The Recipes Generator

Apricot Jam

apricotjam_edits-8.jpg

Eating like a farmer means preserving fruits and veggies when they are comin' in hot and heavy from the fields, so you can save + savor the bounty all year long. So while pickling, fermenting, kombucha-making, and jamming are all the rage these days - let's be clear that these methods of food preservation have been going down in farmhouse kitchens for a long, looooong time.

So let's talk about jam. I won't claim to be an expert jam-maker, but I DID manage to make 200+ jars of small-batch jam for our wedding guests back in 2014, and no one perished from botulism, so I suppose that's something... right? And while entire books (and great blog posts, like this one) have been written about jamming, I'm going to briefly summarize the basics + share some tips and tricks I've developed after countless hours jamming out over the stove. Keep scrolling for a recipe (adapted from Serious Eats) for sunshine in a jar... aka Apricot Jam. 

PECTIN, SUGAR AND ACID

  • Pectin is a carbohydrate that helps to ‘set’ jam. It is particularly concentrated in the skins and cores of fruit. I should note here that I do not add store-bought/commercial pectin in my jam recipes, and instead rely on the naturally occurring pectin in fruit + lemon juice for acidity to help the fruit set. Pectin, whether naturally occurring or added, requires heat, sugar, and acid to activate. 
  • High/Moderate Pectin Fruits: blackberries, citrus, cranberries, gooseberries, pears, plums, quinces, sour apples
  • Low Pectin Fruits: apricots, blueberries, figs, grapes, peaches, pears, raspberries, strawberries
  • Low-pectin fruits benefit from lemon juice to boost the acidity and setting of the jam. Unripe fruit will also increase acidity. Avoid making jam with overripe fruit, because as fruit ripens the pectin begins to break down.
  • My rule of thumb for the ratio of fruit / sugar / lemon juice:
    • Weigh your fruit. Take half the weight of the fruit and use it as your sugar measurement. Use as many ounces of lemon juice as you used pounds of sugar. For example, if you are making strawberry jam with 4 lbs strawberries, use 2 lbs sugar, and 2 ounces of lemon juice.

GENERAL TIPS + TOOLS

  • Any time you are preserving food, it's super important to use sterilized jars. You can sterilize jars by putting them in a 225F oven for 20 minutes. Once sterilized, turn the oven off and leave in the warm oven until the jam is ready. Jars and lids can also be boiled for 10-15 minutes in a large saucepan of water, then dried in the oven at a low temperature.
  • Use a non-reactive pot like stainless steel, enamel, or copper when making jam. 
  • This jam-making set is a GAME CHANGER (and I really, really wish someone had told me about it back in 2014 when I was making 200 jars of jam by hand with some very un-efficient equipment)
  • Use tempered jars that can withstand the temperatures involved in sterilizing, jam-making and storage. 
apricotjam_edits-3.jpg

APRICOT JAM

APRICOT JAM

PREP + COOK TIME:

Ingredients:
  • 6 lbs firm-but-ripe freestone apricots (such as Blenheims), halved and pitted
  • 3 lbs sugar
  • 3 ounces fresh lemon juice
  • Instructions:
    1. In the non-reactive saucepan that you plan to make the jam, combine apricots, sugar, and lemon juice and mix until all the sugar is moistened. If some sugar remains dry, allow to macerate until fruit has released enough juices to moisten sugar, 5 to 15 minutes. At this point, you can blend the fruit-sugar mixture with an immersion blender if you woul like the finished jam to have a smoother texture. For more rustic jam with pieces of fruit, leave as is. Set a small plate in the freezer.
    2. Plae the pot on the stove and heat over medium-high heat, stirring regularly, until sugar is melted and mixture starts to bubble, 10 to 15 minutes.
    3. Heat apricot mixture over medium-high heat, stirring with a flat wooden spoon as needed to prevent burning, until jam starts to foam, about 15 minutes. Continue to cook, stirring to prevent burning, until foaming has subsided, about 15 minutes longer; scrape any foam off jam surface with a stainless steel spoon as needed.
    4. Taste the jam (carefully.. it's HOT!) - there should be a balance of sweetness and tartness. Make small adjustments (ie more sugar or lemon juice) if needed.
    5. Continue to cook until bubbling has slowed and jam looks glossy and jam appears thickened around the edge, 10 to 15 minutes. Lower heat as necessary to prevent scorching. Turn off heat and set a dollop of jam on the small plate waiting in the freezer - allow it to sit in the freezer for a few minutes. The jam is ready once it holds together wrinkles when you push it with your finger. If jam is too runny, return to heat and cook, stirring frequently and repeating the spoon test every 5 minutes, until jam passes the "wrinkle" test.
    6. Fit sterilized jars with a wide-mouth funnel. Ladle jam mixture into jars, leaving 1/2" headspace. Take a clean towel and wipe the rims of each jar. Put lids and rings on jars and tighten. At this point, jam may simply be kept refrigerated, up to 1 month.
    7. To process jars in a hot water bath: have a large stock pot filled with water and ready at a rolling boil by the time you are filling jars with jam. Place filled jars with tightened lids into the boiling water one at a time, using a jar lifter or tongs. Keep jars upright at all times. Add more boiling water, if needed, so that water covers jars by at least 2 inches. Increase heat to high and cover. Once water begins boiling, heat jars for 15 minutes. Turn off heat and gently transfer jars out of the stock pot and onto your counter to cool. Avoid placing jars on a cold surface or near a cold draft. Let jars sit undisturbed until fully cooled. Check to make sure all jars have sealed by pressing your finger to the middle of the lid (if sealed, the lid will not pop).

Cardamom Peach Crisp

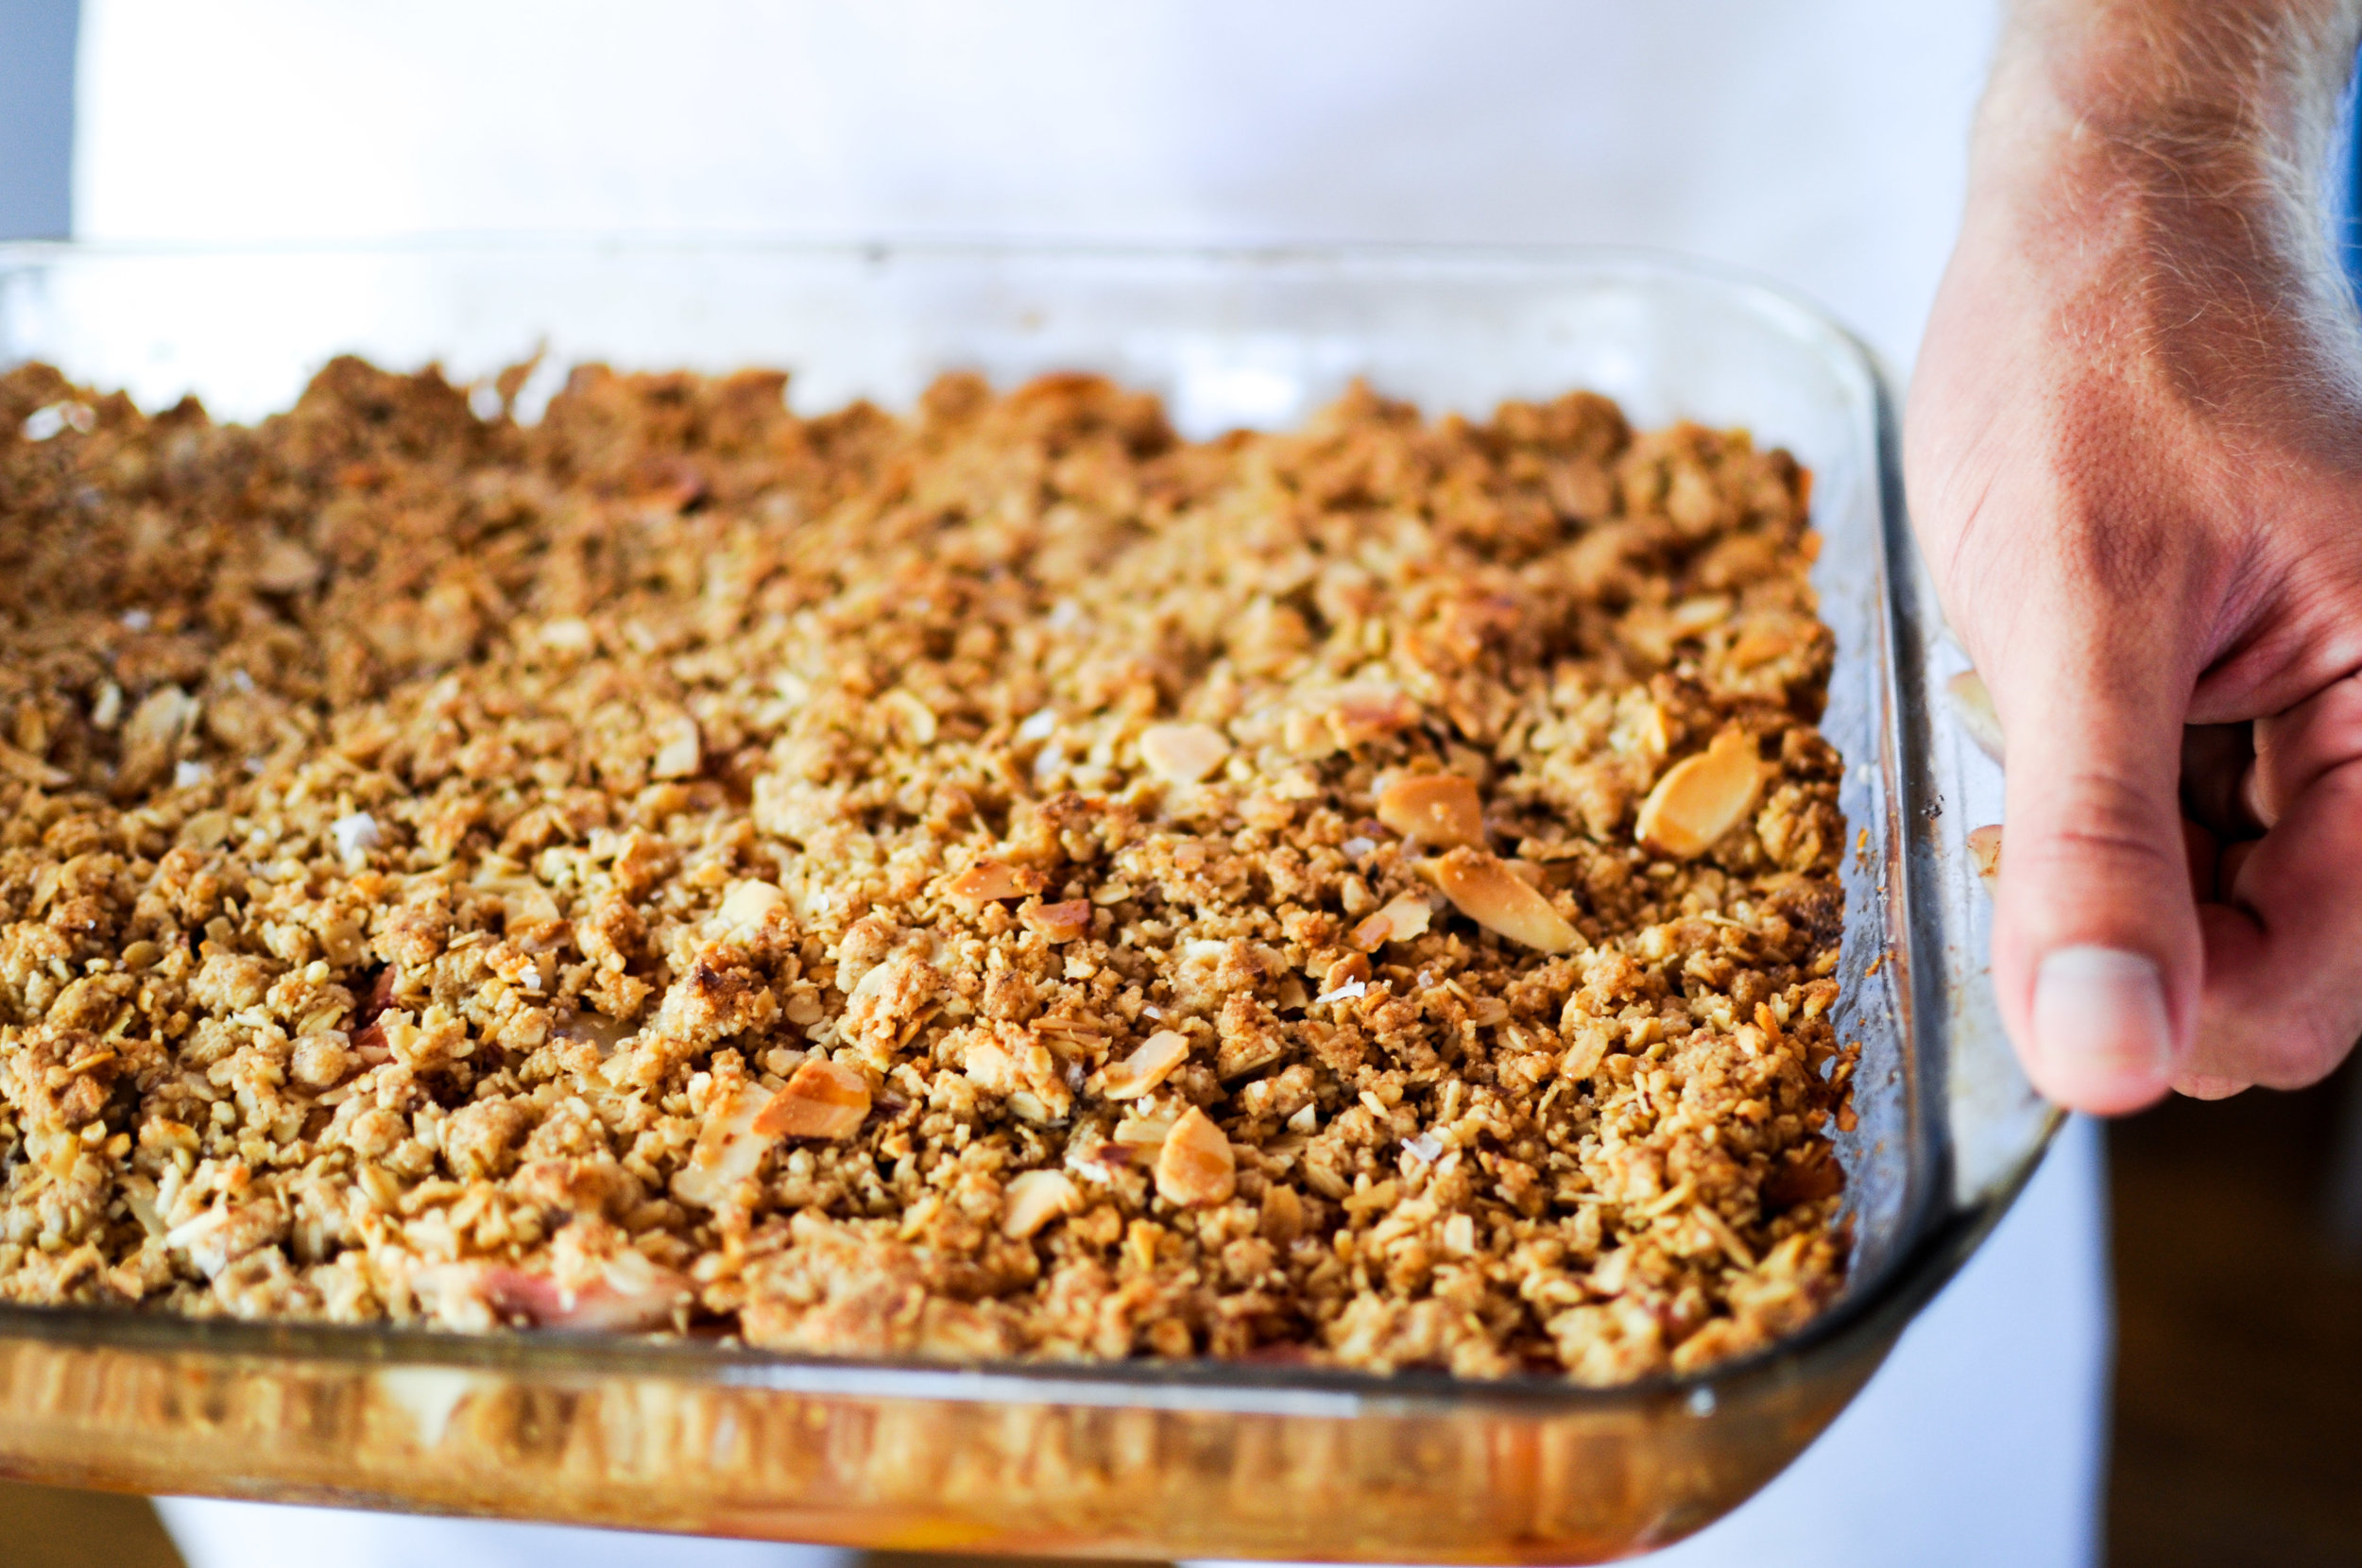
Stone fruit season is upon us in Santa Barbara, which means I'm finding every which way to use up bumper crops of peaches from the farmers' market. I love slicing peaches into salads (especially alongside fresh basil, cucumbers, and salty feta cheese), or simply roasting the halves slathered with honey and butter, with a generous scoop of vanilla ice cream on top. Here is my recipe for another fabulous peach-inspired dessert, a Cardamom Peach Crisp. 

fruit_crisp-6.jpg

CARDAMOM PEACH CRISP

Serves: 8-10 people

Cardamom Peach Crisp

Prep time:

Cooking time:

Ingredients:

    PEACH FILLING

  • 3 pounds peaches, peeled and diced (6-7 peaches)
  • 2 tablespoons melted butter
  • 1 tablespoon cornstarch or tapioca powder
  • 2 tablespoons honey
  • 2 tablespoons brown sugar
  • Juice of one lemon
  • 1 teaspoon vanilla extract
  • 1/2 teaspoon ground cinnamon
  • 1/4 teaspoon cardamom
  • Pinch of kosher salt

CRISP TOPPING

  • 1.5 cups old-fashioned oats
  • 1/2 cup almond meal or almond flour
  • 1/3 cup sliced or roughly chopped almonds
  • 1/3 cup brown sugar
  • 1 teaspoon cinnamon
  • 1/4 teaspoon cardamom
  • 1/4 teaspoon kosher salt
  • 8 tablespoons (1 stick) cold butter, diced into small cubes
  • 2 tablespoons plain greek yogurt
  • Instructions:
    1. Preheat oven to 400°F.
    2. PREPARE PEACH FILLING: In a 12” cast-iron skillet (or pyrex dish), mix together the sliced peaches, honey, brown sugar, lemon juice, cornstarch, vanilla, cinnamon, cardamom and a pinch of salt.
    3. PREPARE CRISP TOPPING: In a medium mixing bowl, stir together the oats, almond meal, almonds, brown sugar, cinnamon, cardamom, and salt. Mix in the cubes of cold butter and use your hands to blend the butter into the other topping ingredients, until only pea-sized pieces of butter remain. Stir in 2 tablespoons of plain yogurt, until the mixture is moistened throughout.
    4. BAKE THE CRISP: Dollop spoonfuls of the oat mixture over the filling and use your fingers to break up the mixture until it is evenly distributed. Bake for 25-30 minutes, or until the filling is bubbling around the edges and the top is lightly golden. Allow to cool for 5 to 10 minutes before serving. Serve with a scoop of vanilla ice cream or plain yogurt.

    Blood Orange & Chia Seed Pudding

    Recently I spied a lonely bag of blood oranges languishing in the $0.99 "ugly" bin at the grocery store. Holding the bag up and inspecting it from all sides, I saw a few bumps and bruises... but nothing that a little love and creativity couldn't fix. So I juiced those puppies and whipped up a blood orange + chia seed pudding with pistachios and honey - and HOT DAMN it was good. See below for the (very simple) recipe... I recommend filling up a few mason jars so you'll have a few healthy + hearty breakfasts or snacks ready when hunger hits. Regular oranges would work beautifully if you don't have access to blood oranges. 

    It starts with little things like giving a second life to bargain bin oranges... but I hope to be better about embracing + celebrating the imperfections in the world, in others, and in myself. Embrace the bumps ya'll (because perfection is boring anyway). 

    chiapudding-1.jpg

    BLOOD ORANGE AND CHIA SEED PUDDING

    Fresh citrus, yogurt, and chia seeds make a healthy + hearty breakfasts or snack ready when hunger hits. Regular oranges would work beautifully if you don't have access to blood oranges.

    Serves: Serves 2

    Blood Orange and Chia Seed Pudding

    Prep time:

    Ingredients:
    • 1 cup plain yogurt, divided
    • 1/2 cup fresh blood orange juice
    • 1/2 teaspoon vanilla extract
    • Pinch kosher salt
    • 2 tablespoons honey, plus more for serving
    • 1/4 cup chia seeds
    • 2 blood oranges
    • Chopped pistachios, for serving

    Instructions:
    1. Whisk 1/2 cup of the yogurt, 1/2 cup blood orange juice, vanilla extract, salt, and honey in a medium bowl. Whisk in chia seeds, cover, and chill at least 8 hours and up to 1 day.
    2. Cut peel and white pith from the two blood oranges. Cut along sides of membranes to release segments into a medium bowl.
    3. Give pudding a good stir and divide between two bowls, creating layers with the remaining yogurt and orange segments. Top with pistachios and remaining orange segments, drizzle with honey, and enjoy!